top of page
PROJECT 1
Building modelling and Documentation


Selected Building:
PVT HOUSE, HUE, VIETNAM
PROGRESSIVE WORK EVIDENCE
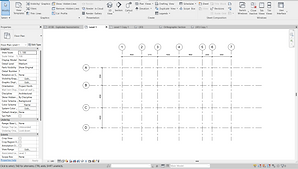
STEP 1: Adding reference drawing and creating grid lines

STEP 2: Creating levels

STEP 3: Creating Walls

STEP 4: Creating Floors

STEP 7: Repeat for Second and Third floor

STEP 5: Adding doors and windows

STEP 8: Test renderings

STEP 6: Adding stairs

STEP 9: Creating family

STEP 10: Loading families into project

STEP 11: Final detailing and last rendering

bottom of page